Tailscale is a virtual private network (VPN) service that allows secure remote access to resources across different networks. It offers a feature called MagicDNS that enables you to access your resources using a domain name instead of an IP address. Additionally, you can use HTTPS certificates to encrypt traffic between clients and servers, ensuring secure communication. In this tutorial, we’ll explain how to enable MagicDNS and HTTPS certificates in Tailscale and how to add a TLS certificate to Home Assistant using Tailscale. The most practical benifit for using Home Assistant within a Tailscale network is that it removes the requirement for network port forwarding and exposing services publicly, whilst still allowing your devices to access it from outside your local network. This blog post aims to give you the starting stes required to setup MagicDNS and HTTPS certificates in Tailscale, create a certificate on your home server and install that certificate in a Home Assistant docker container.
WHY?! Why do I want a valid TLS certificate and a HTTPS connection to Home Assistant without a browser warning? Per the 2023.5 relase (https://www.home-assistant.io/blog/2023/05/03/release-20235/) voice control is all the rage using local voice assistants; in order to use the microphone in a modern browser connected to you Home Assistant dashboard, you need to have a valid HTTPS connection!
Enabling MagicDNS
- Sign in to your Tailscale admin console and select your network.
- Click on “Nodes” and select the node that you want to enable MagicDNS for (You might only have one default node like me).
- Under “DNS” click “Enable MagicDNS.”
Once you’ve enabled MagicDNS, you can access your devices using the tailnet domain allocated to your network. For example, mypc.exampletail.ts.net, where mypc is the device name.
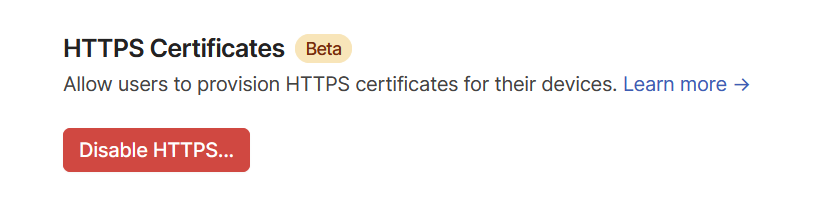
Enabling HTTPS Certificates
- Navigate to the DNS page of the admin console.
- Under HTTPS Certificates, click Enable HTTPS.
- Acknowledge that your machine names and your tailnet name will be published on a public ledger.
Once you’ve enabled HTTPS certificates, you can generate the certificate and private key by running the following command on each machine (linux):
sudo tailscale cert xxxx.xxxx.ts.net
Replace xxxx.xxxx.ts.net with your tailnet domain, found on the DNS page of the admin console.
This will download two files: xxxx.xxxx.ts.net.crt and xxxx.xxxx.ts.net.key.
Adding the TLS Certificate to Home Assistant
To add the TLS certificate to Home Assistant, you need to convert the private key to PEM format and copy the certificate files to the Home Assistant container’s SSL directory. The following steps are based on a docker compose installation of HA, assuming the .crt and .key files created above are stored in /home/user/ (your file path will likely differ).
- Convert the private key to PEM format using the following command:
sudo openssl pkcs8 -topk8 -nocrypt -in /home/user/xxxx.xxxx.ts.net.key -out /home/user/private.pem
Replace /home/user/xxxx.xxxx.ts.net.key with the path to the downloaded key file.
- Make a directory for the TLS certificate files in the Home Assistant container’s file structure:
mkdir /home/user/docker/homeassistant/ssl
- Add a volume mapping for the newly created ssl folder to your
docker-compose.ymlfile, this will be where Home Assistant stores and locates the TLS certificate files:
    volumes:
      - /home/user/docker/homeassistant/ssl:/ssl
You might alreaady have other volumes like I do for config and data; we are just adding another in this step.
- Copy the certificate files to the TLS directory:
sudo cp /home/user/xxxx.xxxx.ts.net.crt /home/user/docker/homeassistant/ssl/fullchain.pem
sudo cp /home/user/private.pem /home/user/docker/homeassistant/ssl/privkey.pem
Replace /home/user/xxxx.xxxx.ts.net.crt with the path to the downloaded certificate file.
- Update the Home Assistant
configuration.ymlfile to include the SSL certificate and key paths:
http:
  ssl_certificate: /ssl/fullchain.pem
  ssl_key: /ssl/private.pem
Save the file and restart the Home Assistant container:
docker compose up -d
Now, you should be able to access Home Assistant securely using the MagicDNS domain name: https://mypc.example.ts.net:8123/.
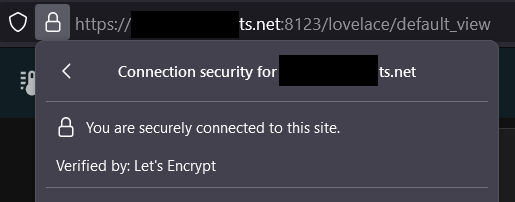
NOTE: You will need to be accessing this URL from a Tailscale connected device which is configured to use Tailscale DNS!