In previous posts, I’ve explained how to use Tailscale’s MagicDNS and HTTPS certificate feature to generate a TLS cert for your Home Assistant install: Homeassistant Enable MagicDNS and HTTPS Certificates in Tailscale. That setup required you to reformat the TLS cert and copy it to the Home Assistant container… it wouldn’t be to much of a task to automate those actions, but fortunately there is now a superior method of applying and renewing a Tailscale cert for HASS (and many other self-hosted services). Let us dig in to that…
Tailscale is a virtual private network (VPN) service that allows secure remote access to resources across different networks. It offers a feature called MagicDNS that enables you to access your resources using a domain name instead of an IP address. Additionally, you can use HTTPS certificates to encrypt traffic between clients and servers, ensuring secure communication. In this tutorial, we’ll explain how to enable MagicDNS and HTTPS certificates in Tailscale and how to add a TLS certificate to Home Assistant using Tailscale. The most practical benifit for using Home Assistant within a Tailscale network is that it removes the requirement for network port forwarding and exposing services publicly, whilst still allowing your devices to access it from outside your local network. This blog post aims to give you the starting stes required to setup MagicDNS and HTTPS certificates in Tailscale, create a certificate on your home server and install that certificate in a Home Assistant docker container.
WHY?! Why do I want a valid TLS certificate and a HTTPS connection to Home Assistant without a browser warning? Per the 2023.5 relase (https://www.home-assistant.io/blog/2023/05/03/release-20235/) voice control is all the rage using local voice assistants; in order to use the microphone in a modern browser connected to you Home Assistant dashboard, you need to have a valid HTTPS connection!
Enabling MagicDNS
- Sign in to your Tailscale admin console and select your network.
- Click on “Nodes” and select the node that you want to enable MagicDNS for (You might only have one default node like me).
- Under “DNS” click “Enable MagicDNS.”
Once you’ve enabled MagicDNS, you can access your devices using the tailnet domain allocated to your network. For example, mypc.exampletail.ts.net, where mypc is the device name.
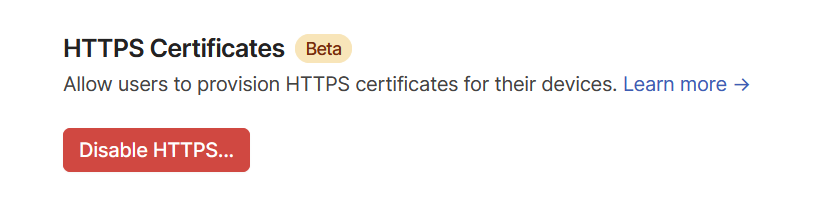
Enabling HTTPS Certificates
- Navigate to the DNS page of the admin console.
- Under HTTPS Certificates, click Enable HTTPS.
- Acknowledge that your machine names and your tailnet name will be published on a public ledger.
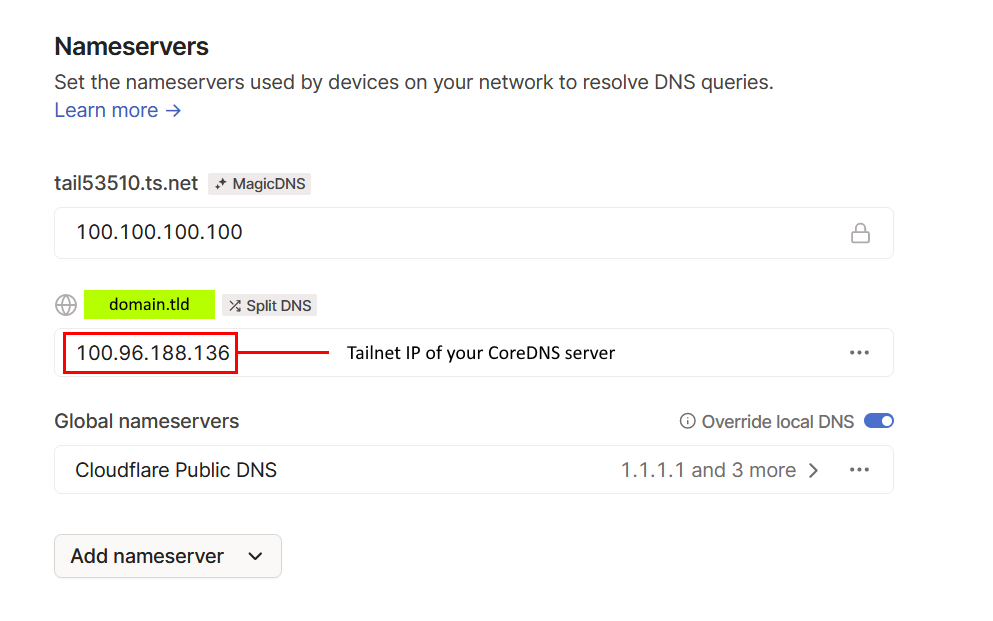
Configure Tailnet Nameservers
With MagicDNS enabled, we need to turn on splitDNS and set the nameserver to the Tailnet IP of the host which will be running our CoreDNS container - Yes, you need to have your docker host on your tailnet for this to work.
Here is what you should end up with:
This is where things change from the previous post. This method is slightly more complex, as it required the adition of a Traefik and CoreDNS container, but once it is configured, it is exponentially more effective and scales well to other services.
You are going to need a domain that you own and that you can control the DNS configuration of. This setup is using the Certbot DNS-01 Challenge. This challenge asks you to prove that you control the DNS for your domain name by putting a specific value in a TXT record under that domain name. The easiest was to get your domain ready for DNS-01 is using cloudflare, but this is beyond the scope of the post. The best guide I could find for cloudflare, DNS-01 readiness is here: How to create Let’s Encrypt certificate using Cloudflare API token. This API token is essential and referenced below in our Traefik Docker Compose yaml file.
CoreDNS Docker Compose
version: '3'
services:
    coredns:
      image: coredns/coredns:1.11.1
      container_name: coredns
      restart: always
      dns: 127.0.0.1
      ports:
        - 53:53/udp
      volumes:
        - ./config:/root/
      command: -conf /root/Corefile
Inside our config directory, we have a corefile which holds the DNS records we need.
CoreDNS Config File
. {
    forward . 8.8.8.8 9.9.9.9
    log
    errors
}
<ignored-subdomain.domain.tld> {
    forward . 8.8.8.8 9.9.9.9
}
auto <domain.tld> {
    root /root
    file zones/<domain.tld>.zone
    prometheus
    errors
    log
}
If like me, you have some A records which point to public services and you don’t want lookups for these subdomains to be done in CoreDNS, you need to instruct CoreDNS to forward them; in this case the lookup is forwarded to 8.8.8.8 (or 9.9.9.9).
CoreDNS Zone File
This is the file listed in our config file:
file zones/<domain.tld>.zone
Our <domain.tld>.zone file should look like this:
$TTL 300
; generated with dnscontrol 2023-11-14T21:02:31Z
@          3600  IN SOA   sns.dns.icann.org. noc.dns.icann.org. 2023111400 7200 3600 1209600 3600
                 IN NS    ns1.example.com.
                 IN NS    ns2.example.com.
                 IN NS    ns3.example.com.
                 IN NS    ns4.example.com.
home             IN A     <your_docker_host_tailnet_IP>
www              IN A     127.0.0.1
                 IN AAAA  ::1
This config assumes that your Home Assistant container is running on the same Tailnet host as CoreDNS and Traefik.
Traefik Docker Compose
version: "3"
services:
  traefik:
    container_name: traefik
    image: traefik:v2.10
    labels:
      - traefik.enable=true
      - traefik.docker.network=traefik_proxy
    ports:
      - "80:80"
      - "443:443"
    volumes:
      - "/var/run/docker.sock:/var/run/docker.sock"
      - "./certs:/letsencrypt"
      - "./traefik.yml:/etc/traefik/traefik.yml"
      - "./dynamic.yml:/etc/traefik/dynamic.yml"
    restart: unless-stopped
    environment:
      - "CF_API_EMAIL=<your_email_address>"
      - "CF_API_KEY=<your_cloudflare_API_key>"
    networks:
      - traefik_proxy

networks:
  traefik_proxy:
    external: true
Traefik Config YAML files
We need these two yaml files which are reference in the compose file as they define some important settings within Traefik’s running configuration.
traefik.yml
entryPoints:
  http:
    address: ":80"
    http:
      redirections:
        entryPoint:
          to: https
          scheme: https

  https:
    address: ":443"

serversTransport:
  insecureSkipVerify: true

providers:
  docker:
    endpoint: "unix:///var/run/docker.sock"
    exposedByDefault: false
  file:
    directory: /etc/traefik/

certificatesResolvers:
  le:
    acme:
      email: <your_email_address>
      storage: /letsencrypt/acme.json
      dnschallenge:
        provider: cloudflare
        resolvers:
          - "1.1.1.1:53"

log:
  level: debug
dynamic.yml
tls:
  options:
    default:
      minVersion: VersionTLS12
      cipherSuites:
        - TLS_AES_128_GCM_SHA256
        - TLS_CHACHA20_POLY1305_SHA256
        - TLS_AES_256_GCM_SHA384
        - TLS_ECDHE_RSA_WITH_CHACHA20_POLY1305_SHA256
        - TLS_ECDHE_RSA_WITH_AES_128_GCM_SHA256
        - TLS_ECDHE_RSA_WITH_AES_256_GCM_SHA384
Home Assistant Docker Compose
All that is left is to configure our Home Assistant container to use Traefik as a proxy. This is done by setting labels:
version: '3'
services:
  homeassistant:
    container_name: homeassistant
    image: "ghcr.io/home-assistant/home-assistant:stable"
    volumes:
      - ./data:/config
      - /etc/localtime:/etc/localtime:ro
    restart: unless-stopped
    labels:
      - "traefik.enable=true"
      - "traefik.docker.network=traefik_proxy"
      - "traefik.http.routers.home.entrypoints=https"
      - "traefik.http.routers.home.rule=Host(`home.<youdomain.tld>`)"
      - "traefik.http.routers.home.tls.certresolver=le"
      - "traefik.http.services.home.loadbalancer.server.port=8123"
    networks:
      - traefik_proxy

networks:
  traefik_proxy:
    external: true
Now all that’s left is to bring all our containers up; in the following order: CoreDNS > Traefik > HomeAssistant.
docker compose up -d
This post uses Docker Compose V2, if you are still using V1, consider upgrading otherwise use
docker-composeinstead ofdocker compose.
Please note that we MUST use the traefik_proxy docker network; this essentialls means that all trafic destined for the Home Assistant web application, routes through Traefik.
As an added bonus, this means that we can access our love lace dashboards without the :8123 port in the URL. The even more exciting thing is, we can now enable Mic usage in our browser, which means we are ready to make the most of all the great voice assistant feature that the HA developers have been working on: Home Assistant voice control.
Conclusion
These Docker Compose file seamlessly integrates Home Assistant with Traefik, providing a flexible and scalable solution for managing home automation services with secure access through Traefik’s reverse proxy capabilities. The use of labels in Traefik configuration enhances the control and routing capabilities, making it an efficient and secure setup for Home Assistant deployment.